Posted on Leave a comment

Airush DNA 2011 Kitesurfing Kite Review

Airush 2011 DNA
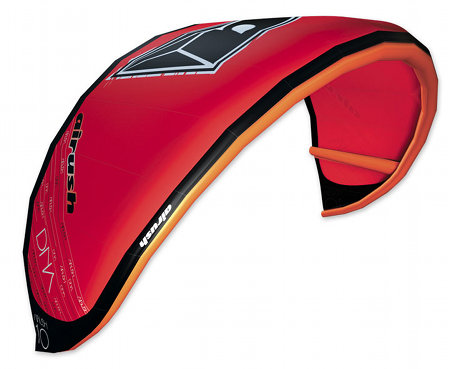
The Airush DNA comes in 4, 6, 8, 10 and 12m sizes. Designed primarily as a school/beginner kite it has a delta-hybrid design with a full flag-out safety system. It is based on the Airush Lithium kite but is built to be stronger and easier to handle for the beginner. We first got our hands on one of these about a month ago and have been using them ourselves and in the school for teaching ever since.

When you unroll the kite the first thing you will notice is that it is simple. The bag is functional (and not much more) the kite has no 1 pump system, the graphics are again functional but uninspiring. First impressions of this kite are not great. That said however the kite looks well put together and it was due to the legends of its tough design that we were attracted to them in the first place. Its still too early in the season to say how they will stand up but if the reports from last years model hold true we hope to be impressed.

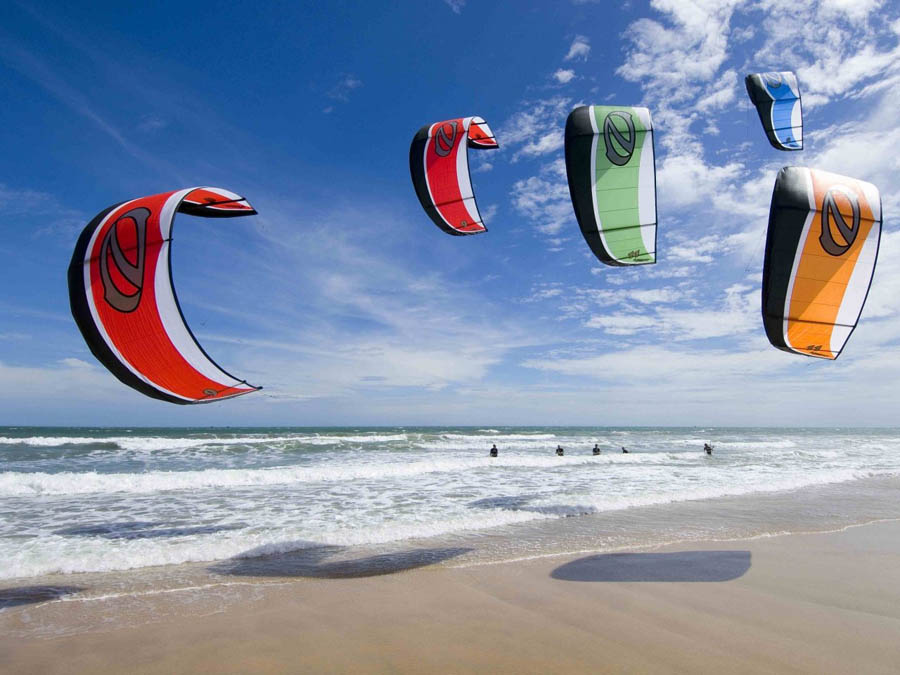
Put the kite in the air and everything changes. The kite performs amazingly in all conditions, and I mean all! We’ve had this kite out in horrendously gusty conditions here in Tarifa where the wind is blowing from 5 kts up to 30 kts and it it still possible to teach. More impressively in really light winds where there are huge holes in the wind the kite will cope with the lulls much better than anything I have ever seen before staying in flight for an age with next to no wind before it starts to drop. Compared to the kites we’ve taught on in the past and by looking at the other kites on the beach I can honestly say it seems to perform the best across the widest range of conditions.

We (and the other schools teaching on DNA’s) are regularly the schools with the first kite up as the wind builds and last kite down when it dies. The kite seems almost impossible to back or front stall, simply powering up as you pull the bar in or dropping back in the window if it overshoots the window. The kite keeps its power and distance in the turns and even when you’re really flinging it around will keep tension in the lines. It relaunches effortlessly even in light winds. All this combines to give us more teaching time and a better advancement rate with our clients than we’ve ever had in the past.

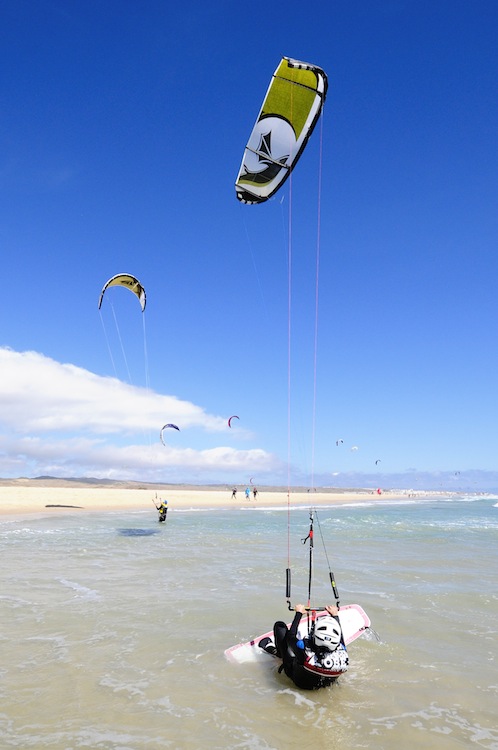
More than simply a school kite however I have to say I really love riding this kite, sure it’s not the most dynamic kite in the world but it just makes kiting hassle free. Mess up a jump and land with the kite upwind, the kite simply moves back into position over your head. Struggling in light winds? Just pull the bar in and instead of that awful back stall sensation the kite simply shifts back slightly in the window and then continues to power up. The kite seems to relaunch using the force and is almost effortless…time after time. Again this isn’t a kite that will have the pro’s raving but as a functional, easy to use, 1st time kite I do not believe this kite can be beaten by anything I’ve ever ridden or taught on.

There are of course some down sides. The kites not the most beautiful and you’re mates certainly wont be jealous the first time you pull it out of its bag! The graphics are simple and the colours are not the most eye catching. It is not blisteringly fast and if your after a radical ride this probably isn’t the kite for you. I can’t imagine Ruben Lenton wanting to fly a kite like this for very long as it simply doesn’t feel like it’s built for performance.

In short the DNA’s simplicity is it’s greatest strength. It is possibly the best beginner/school kite on the market but is also great for intermediates who simply want hassle free kiting. With its amazingly stable flight and relaunch characteristics it’ll keep you kiting in conditions that before you wouldn’t have thought possible or wanted to brave. That said if you’re looking for a radical kite to perfect your f-16’s on, this maybe isn’t the kite for you.

Update after 1 Year’s Use In The Kite School

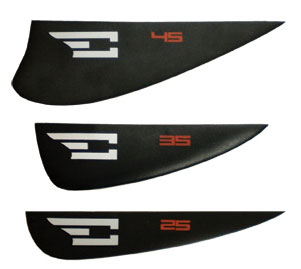
Although a superb kite to teach on we won’t be buying the DNA’s next year for our school as we simply found them too fragile for the kind of rough treatment they get whilst being used in our kite school. I still love the kites to fly, but they seem to have just too many weak points, many caused by over reinforcement of certain areas, ie. the ‘pads along the trailing edge. This leads to the material around the reinforcement being put under too much pressure and consequently breaking under the strain.

Tried the Airush DNA and want to let us know what you think? Let us know in the comments below…

Posted on Leave a comment

Kitesurfing Rules of the Road – Part 2

So you’re kitesurfing away from the shore, out of the white water and riding on the open ocean. From here on things start to get a little bit more complicated as there are several laws which overlap and it’s up to you, in each given situation, to work out which one to apply.

The most important law and the one which normally takes precedence over the others in kitesurfing is the law of the starboard rider. If you don’t know your port and your starboard, port is left and starboard right. This can be easily remembered with the saying “there’s no port left in the bottle.” Hence the starboard rider is the one with his right foot forward or who is looking over his right shoulder. This applies when you’re riding heel side so if you riding heel side you right foot is forward and you’re looking over your right shoulder you’re riding on starboard tack and so have right of way. Simply reverse this if riding toe side, so you’ll be kitesurfing with your left foot foot forward looking over your left shoulder.

You’ll often hear, especially sailor types, screaming starboard at you as they pass you. Up till now I imagine you’ve blithely smiled back and maybe waved, totally ignorant of what they’re talking about. By screaming starboard they’re indicating that they are on a starboard tack and thus have right-of-way. Roughly translated as get out my way before I wrap my lines around your head!

As I said, this is a rule that will apply when you’re riding in the open ocean, but it’s not the only rule. We will cover these other rules in more detail in a later post. For the moment however if you have any comments or questions please leave them in the comments box below and I’ll get back to you as soon as possible.

Posted on 5 Comments

How To Care For Your Kitesurfing Kite And Make It Last Twice As Long

Kitesurfing Kites, keeping them fresh

Kitesurfing Kites

How do you make sure your expensive new kitesurfing kite doesn’t fall apart after 5 sessions? By following these few simple guidelines you can increase the lifetime of your kite and get so much more value for your money.

Ironically enough the 3 main things you need to avoid with your kite are sun, wind and sand!

Now I know that avoiding the last 2 of those is pretty much impossible, unless you live in the UK in which case avoiding the sun is very easy!

Why Kites Aren’t Sun Worshippers

UV from the sun will damage the kite as it damages most materials. If you live in a warm climate this is however pretty much unavoidable. In a cruel twist of irony the wind will also damage the kite. This is especially true when the kite is left sat on the beach flapping in the wind.

Ever seen a flag that’s been flying too long, all frayed at the end?

That’s exactly what the winds doing to your kite. The best way to avoid both the wind and the sun is to put the kite back in the bag if you intend to leave it on the beach for any length of time.

The Biggest Kite Killer

The biggest kite killer however is sand. Sand will work its way into and rub against the material and the stitching of your kite, weakening both and in time leading to tears and breakages. The best way to avoid this is to clean your kite thoroughly as you put it away, brushing all the sand off the kite as you pack it down.

Kitesurfing Kites, keeping them fresh

Wet Kite?

If the kite is wet or damp when you put it away it’s not always possible to get all (or indeed any!) of the sand off, in this case the kite should be cleaned at the first opportunity.

Another real kite killer is the heat. When kites are left in a car or in a warm place in the sun the glue that holds the valves onto the bladders will often melt.

Leaving you with small holes where the valve has come unattached from the bladder and through which air can escape. Meaning that the next time you come to inflate your kite you find it mysteriously has a very slow puncture which is very difficult to locate. Avoid this by storing the kite in a cool dry place.

The Debate Rattles On

There is a lot of debate about as to whether you should clean your kite in freshwater once you’ve finished a session on the sea. Some people believe you should thoroughly wash your kite down in fresh water as this removes the salt which can have a similar effect to sand.

Others suggest that the salt actually preserves the kite and stops it from rotting and gathering mould especially if you are planning to leave the kite in storage for a long time, ie. over the winter. I personally don’t rinse my kites down after use and while I use this excuse if I’m honest with myself it’s probably just laziness!!

Posted on 2 Comments

The 2 Errors People Make Whilst Learning to Waterstart When Kitesurfing

The Water Start
The Water Start

There are two common errors most people make when trying to water start during their kitesurfing lessons which prevent them from riding up, up and away. The first is not pushing the front foot far enough around to release the board onto the plane and the second, of course, is pulling the bar in as you rise out of the water.

The first of these, not pushing the front foot far enough away as you rise out of the water,  results in you coming up with the board too horizontal to the wind. Incredible amounts of power are then required from the kite to keep you going, as the board is offering a load of resistance directly against the pull of the kite. By simply pushing forward with the front leg and coming up at an angle of 45 degrees or more away from the direction of the wind you’ll release the board into the plane, accept the pull from the kite and require an awful lot less power to keep you riding.

The second mistake people make is to pull the bar in whilst rising out of the water. As human beings is our instinct to pull ourselves up using something close to hand while attempting to stand up, this instinct must be resisted as we learn to water start

By putting the bar in we momentarily power up the kite, however when the kite reaches the bottom of the window with the bar fully pulled in it will simply stall backwards leaving us bobbing back into the water teabag style. What we need to aim to do is put enough power through the kite so that the bar stays away from us, and we have no desire to pull it in further.  This done, once the kite reaches the bottom of the window a simple tweak in the right direction will return the kite back towards the top of the window and put it in a position to start our second power stroke.

Posted on 4 Comments

What Difference Do Kitesurfing Fins Make?

Different types of Kitesurfing Fins

Different types of Kitesurfing Fins

Today I want to talk about the difference that fins make to your board and to your riding.  Fins come in many shapes and sizes and most often you simply use whichever size comes with the board when you buy it. This fin will generally be fine for most kinds of riding however you can drastically alter the boards performance by changing the type or the size of the fins you are using.

The way to spot the effect that fins have on your riding is to simply remove the fins from the board. Try riding the board now and you’ll notice the board handles very differently. Your back leg will feel as though its constantly about to slip away from you and the board will release from the water almost effortlessly, enabling you to do surface 180’s almost without thinking.

Fins generally effect 3 areas of board performance, these are grip in the turn, ‘slide’ and upwind ability.

The area where you’ll notice the greatest difference by changing your fins is the grip in the turn. Try a hard carve turn without a fin or with a very small fin and you’ll notice that as you exit the turn and try to apply power in the new direction unless you’re very careful the board will simply “spin out,” you’ll lose all grip in the water and your back leg will fly away from you. This is because the fin is not providing the grip necessary to channel that sudden increase of power as you set off in a new direction and the board literally starts to skim across the surface of the water. Because the board will slip across the surface of the water much more easily with smaller fins, if you’re attempting to go from heel side to toe side you can do it almost effortlessly on a board with no or small fins whilst on a board with big fins you’ll generally have to jump the board out of the water and then spin it whilst your airborne.

The final area where you’ll notice differences between different sized fins is in the up-wind ability of the board. Larger fins, because they have more surface area and thus more grip in the water, generally provide greater up wind performance than a small fin. A larger fin will also produce more lift. A fin actually produces lift just like the wing of an airplane or your kite, which also improves the upwind performance and causes a huge amount of other effects which delves deep into the realm of hydro-dynamics, which is a little beyond the scope of this email, however if you do want to know more leave a comment and I’ll fill you in all on all the geeky details!