[youtube height=”315″ width=”560″]https://www.youtube.com/watch?v=gEHduwqQ2gI[/youtube]
As far as we are concerned in power kiting, kitesurfing, snow kiting or land boarding/buggying there are, in essence, 2 different types of kites. Very briefly these are:
The LEI Kite
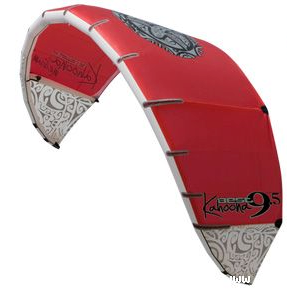
Leading Edge Inflatable (LEI) Kites – LEI simply means that the kite has an inflatable structure, any kite that needs to be pumped up is an LEI. This classification can be broken down into C, Bow, Hybrid and Delta style kites.
The Foil Kite
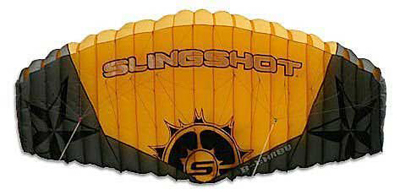
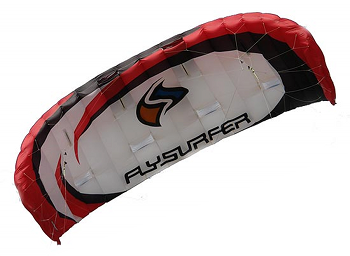
Foil/Power kites – Foil kites look very similar to the wings used by parascender’s and can be broken down into open and closed cell kites. Foil kites are not (generally) inflated with a pump but instead take their shape from the air flowing over and through them.
We’re not going to launch into a full discussion of the relative pro’s and con’s of each of the different types of kites at this point. All we want to do here is show you the different types of kites and very briefly give you an idea of some of the characteristics of each.
4 Line vs 5 Line Kites
Most modern kites will have 4 lines, 2 centre lines and 2 back lines. The centre lines attach to the kite nearer to the centre of the kite and the back lines attach at the back wingtip of the kite. If a kite has a 5th line it will attach in the very centre of the kite.
LEI Kites
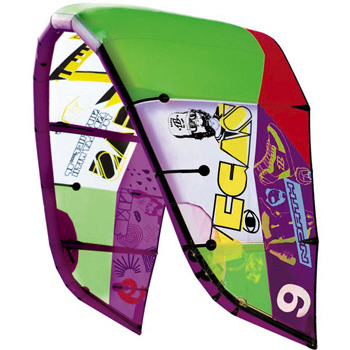
The C Kite
C Style – C style types of kites are recognisable by the lack of a bridle and the distinctive C shape. These kites are the kites that many of us old schoolers learnt on. Fast and powerful through the turn they do however suffer from a lack of de power which has led to their decline in recent years. Recognisable at the beach by their distinctive blocky wing tips and clear corners. These kites have no bridle and the lines attach at each of the 4 corners of the wingtips.
C kites can be either 4 or 5 line, however, if they have 5 lines the fifth line should attach directly to the centre of the kite at one point. If the fifth line splits in any way or joins to a line which then splits and attaches to the leading edge in 2 or more places the kite is a hybrid kite and not a true C kite.
Originally the fifth line was designed to assist with relaunch as it enabled the kite to be pulled up into the relaunch position once it had crashed. Recent improvements in kite relaunch design have rendered this system pretty much obsolete and these days it is mainly used for safety as a kite flagged onto the fifth line will depower 100% and is the safest kind of safety system there is.
The fifth line on a true C kite is not designed to be under tension, the kite does not fly off this line it is solely there for re launch and safety. Conversely the fifth line on a hybrid kite will be under tension as it actually affects the flight characteristics of the kite.
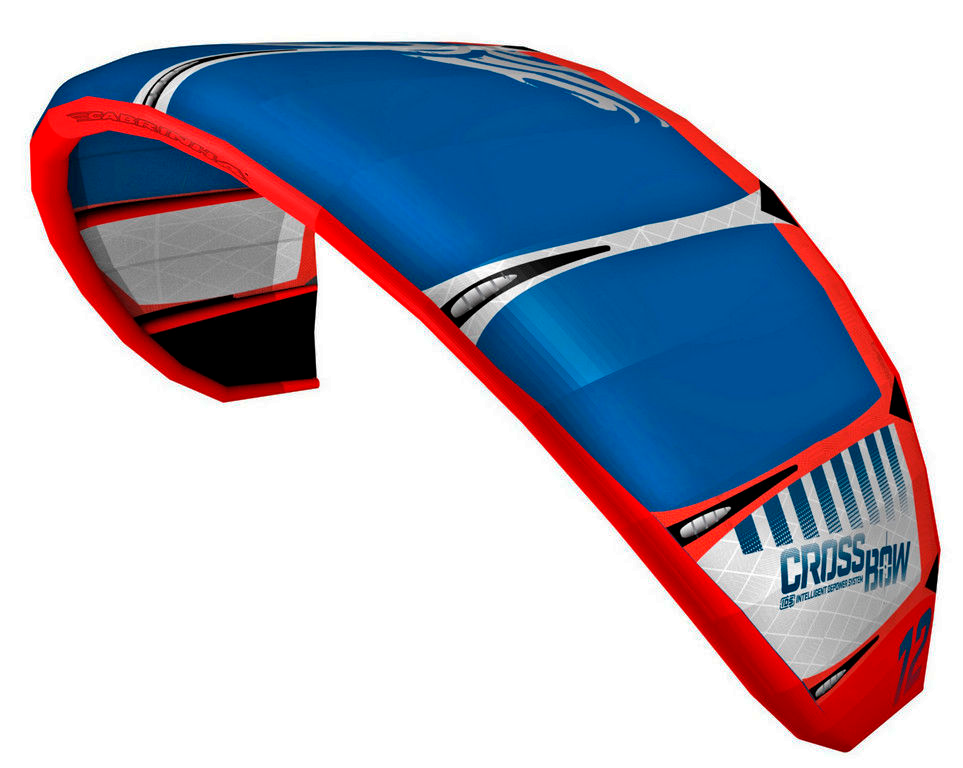
The Bow Kite
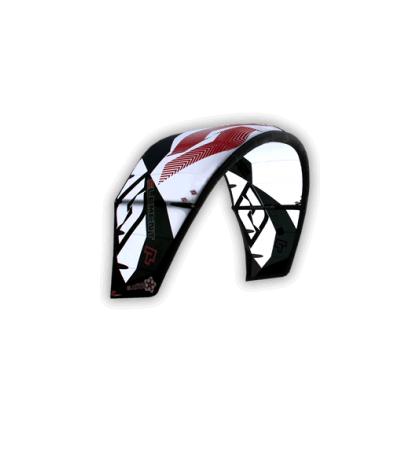
Bow Style – named after the distinctive bow shape of the kite. To be a Bow kite the kite must have a bridle and most will have distinctive swept back wing tips. The bridle on these kites allows for almost 100% de power which means these kites are safer and much more comfortable to ride for people getting into the sport. This alone has led to these kites becoming the dominant kite on the water these days with most schools now teaching on bow kites and many riders preferring them due to their ease of handling and increased safety.
Introduced back in 2005 and said to have been inspired by a thread on a forum, the Bow kite has now spawned several variants. All the kites mentioned below are basically different styles of Bow kites. Several manufacturers have taken the basic Bow kite design and further tweaked, thus you can see the Naish Sigma kite (which has a bent leading edge), and several other funky designs however we only deal with the widespread and widely adopted design trends here.
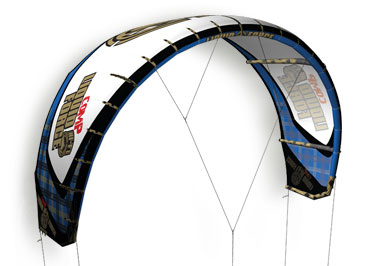
The Hybrid Kite
Hybrid Kites – a trade off between C and Bow style kites. Hybrid kites will always have a bridle of some sort but will also have a concave trailing edge (as opposed to a bow kite which will have a convex trailing edge).
Hybrid kites can be referred to as either hybrid bow kites or hybrid c kites, which simply refers to which design they are closest to, a hybrid C kite will more closely resemble a C kite with the typical C profile but will have a bridle of some sort. Where as a hybrid bow kite will be more similar to a bow, possibly the only distinguishing feature being the concave trailing edge. There now also exist Hybrid Delta kites which again is a Delta kite with a concave trailing edge.
Hybrid kites are designed to capture the best of both kites combining the raw aggression of the C kite design with the precision and flexibility of the Bow design.
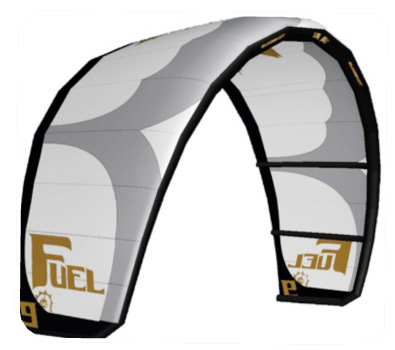
The Delta Kite
Delta Style kites – Delta style types of kites are recognisable by their highly swept back wing tips. These kites are designed to relaunch easier and fly more efficiently in light winds. With some loss of top end performance.
A relatively recent design innovation they were originally introduced in 2009 and have since taken off with most major brands now offering their own design in some shape or form. Due to their easy relaunch, great handling and light wind performance they have become very popular with schools. While not necessarily the kite of choice for the advanced riders they do offer the beginner an even faster route into the world of kitesurfing.
SLE Kites
You are going to hear this term thrown around a lot in Kitesurfing. SLE stands for Supported Leading Edge. This term is used to refer to any kite that has bridles attached to its leading edge. Bow, Hybrid and Delta kites are therefore all SLE kites, C kites are not.
Foil Kites
The debate about foil kites vs LEI kites has been raging in kitesurfing and many other power kite sports for as long as I can remember. General wisdom states that a foil kite is better off the water (snowkiting, landboarding etc) and an LEI kite is better on the water (kitesurfing). Recently there is a growing band of supporters for foil kites amongst kitesurfers and they are definitely becoming a more common sight on the water. One of the main reasons they haven’t been more widely accepted in the kitesurfing world is the price tag, as they can cost up to double what an LEI kite costs. Which you prefer is simply a matter of taste and their are staunch opinions in both the LEI and the foil kite camp. My advise would be to try both types of kites and make up your own mind.
Foil kites possess the obvious advantage of not needing to be inflated, something that all LEI riders who’ve ever tried to inflate a 16m kite can appreciate the value of! They have a wind range comparable to the modern bow kites and are very similar in appearance to a paraglider.
The Open Cell Foil Kite
Open Cell – These kites are designed for use on land and have intakes (cells) along the leading edge of the kite designed to allow air to flow inside the kite and over the canopy. They rely on constant airflow to keep the cells inflated and so cannot be used on the water as if they crash in water these cells the material quickly becomes saturated while the open cells allow water inside the kite which makes relaunch impossible.
The Closed Cell Foil Kite
Closed Cell – The same as open cell but designed for use on water. These kites use inlet valves to hold air in the chamber. The pressure inside the cells keeps the valves open so once the kite crashes and the airflow stops the pressure drops and the cell door closes preventing water from entering. Relaunch is then a simple matter of tugging on the power lines.
While it’s unlikely that you’ll fly all these different types of kites it is useful that you know what you’re talking about when it comes to the different flavours and styles of kites out there. Marketing speak around kitesurfing has become so difficult to interpret and negotiate that by having a grounding in the different terminology used to describe kites you can at least start to form your own ideas on how different types of kite behave and the major differences between them.
Equipment You Will Need To Start Your Training
Here we introduce you to the actual kite equipment you will need to begin your training. Go out and beg, borrow or steal it as fast as you can!
The Trainer Kite
The most essential bit of kite equipment to kick start your training. Kitesurfing, landboarding, snowkiting or buggying are 80% about the kite. If you can control the kite you will learn these sports in a matter of hours not days. A trainer kite is the safest and fastest way into power kite flying and spending 10+ hours flying a trainer kite before arriving on course will likely reduce your learning time by 2 – 3 days…saving you a hell of a lot on course fees!! It also means when you get back you have something to teach your partner, kids, grandparents or friends on!
Every hour you spend flying a kite prior to trying to put a board on your feet will double your chances of getting up and riding, hopefully avoiding the frustration of continually crashing your kite into the water. Snow kiting and land (power) kiting can be learned in one tenth of the time that water kiting can be learned and a basic trainer will get you started down this road. You’ll also find that you don’t crash your full size kite half so much, meaning that when you do finally buy a full size power kite it stays in much better condition for longer!
The trainer kite we are recommending you learn on is the Flysurfer Viron. We actually use these kites in our kite school and I have to say we’ve been absolutely blown away by their performance. Flying on 5 lines they are absolutely stable, even in gusty winds. Their wind range is incredible so you’ll find yourself able to fly them in almost no wind up to howling gales…safely. They are so ridiculously easy to handle and relaunch you’ll be able to fly them all day with no real problems and best of all they handle the same as the LEI kites you’ll be flying once you’re up and riding.
They are also perfect for starting out in landboarding or snowkiting and are forgiving enough that (once you know what you’re doing) you can teach you entire family on them.
They are however a little on the expensive side!
Other cheaper alternatives exist. A simple 2 line trainer kite can be found for around 20 €, with these it is generally a case of you get what you pay for. Try to get one with a bar if you can, but the most important thing is to get something and get flying.
A kite with a control bar helps (as opposed to handles or simple straps) as it is similar to the kitesurfing kites set up and if you feel so inclined you’ll be able to attach a windsurf harness line to the bar and invest in a harness so you really get used to the hooked-in feel of kitesurfing. This also prevents you (to a certain extent) developing bad habits when you move up to 4 line kites.
If you do opt for a 4 line trainer kite beware , these boys pack a punch, we wouldn’t advise anything over 2m and even then treat it with respect (the Virons are a little more gentle than most and a 4 or even 6m is probably fine).
Helmet
An absolutely essential bit of kite equipment, if you are serious about doing the sport…please, please, please never fly a kite without a helmet. I know you may think it looks goofy but better that than a stint in hospital with bits broken off your head. Any helmet will do to start with, even old bike helmets are better than nothing. Remember snowboarders used to scoff at helmets until enough of them got dropped on their head to realise they were actually a pretty sensible thing to have!
The Anemometer or Wind Meter…or thingy!
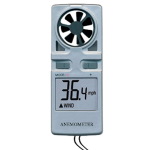
These are great bits of kite equipment and will last you your entire kitesurfing career. This is essential so you can be sure what strength the wind is blowing and whether you should loft your kite or go to the pub. We talk more about these in a later chapter.
Kite Killers
If you’re going to be flying a kite you need one of these, absolutely essential bits of kite equipment, unless your kite comes with an inbuilt safety system and leash (the Viron does). With one of these babies fitted snugly around your wrist you can let go of the bar and watch your kite fall gracefully (and powerlessly) to the ground while leaving it still attached to you. Thus means you can simply walk over and retrieve your fallen kite. Without a kite killer fitted, when you drop the bar, your kite, bar and everything will simply fly off down the beach away from you and inevitably land in the nearest barb wire fence…even if there’s not one for miles around they always seem to find them. You also look like a damn idiot as you have to chase the kite down the beach for 20 mins.
To fit your kite killers attach one end to your wrist (it will be obvious which end) and the other to one of the back lines (the outside ones on a 4 line kite) ensuring that where you attach it is at least 1 kite span (the length of the kite from wing tip to wing tip) away from the bar. This will ensure that when you let go of the bar the kite fully ‘flags out’ and flies only on one line powerlessly. Most kites should have a stopper ball or knot to show you where the kite killers attach.
NOTE: If you have bought one of the Flysurfer Virons we recommended earlier they come with their own leash and safety system and so you don’t need any kite killers. I swear we’re not an affiliate!
The one thing I haven’t mentioned here is probably the most important…yourself. You obviously need to be in good shape to kitesurf and to that end we’ve put together a free 7 day kitesurf specific workout. You can grab your free copy here >>
