Posted on Leave a comment

Setting Up An LEI Kite

Setting Up An LEI Kite

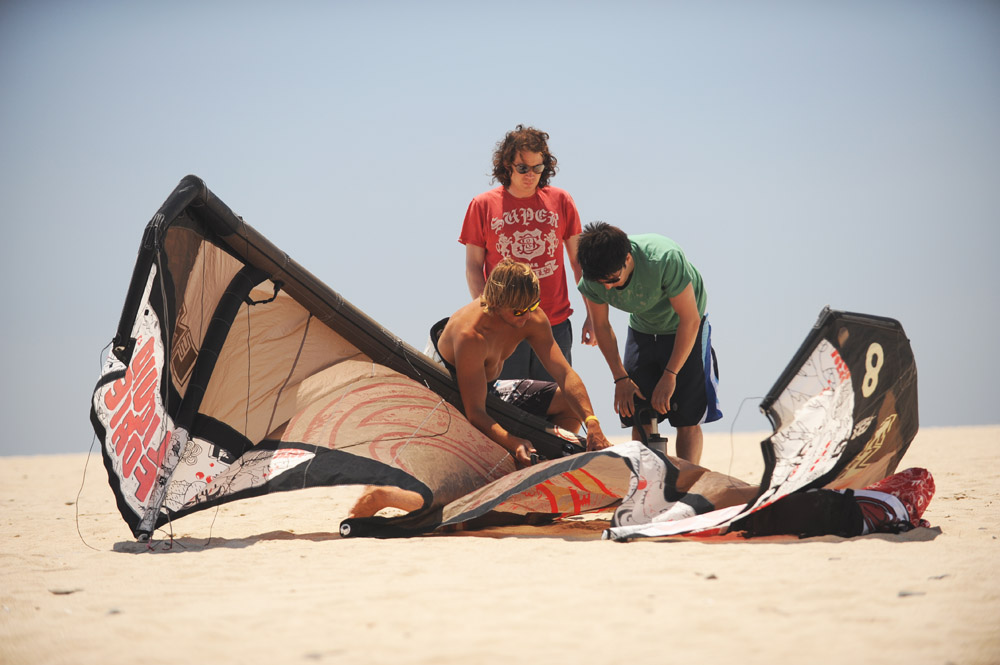
Now that some of you will be moving onto Leading Edge inflatable (LEI) kites, we’d better take some time to explain how to set these baby’s up, as it’s very different to the kites we’ve been using so far.

By now you should be happy with the concept of upwind and downwind. An object upwind is nearer to the source of the wind than an object downwind. Thus if person A is upwind of person B and person has not washed in a long time, then person B will be able to smell person A as the wind is blowing off the upwind person A onto the downwind person B.

We will be setting up our kites with the kite upwind and the lines running downwind to the bar. The reason for this will become clear when we have set the kite up.

First take out the kite. The first thing to look for is to examine the first strut you can find. The strut is one of the the inflatable condoms running the width (not length) of the kite. Have a look at how you put air into the strut. If there is a tube leading from the leading edge to the strut and no way to inflate the strut directly you have what is called a one pump system on your kite. Otherwise you’ll find a valve on the strut itself allowing you to inflate the strut directly.

Setting Up An LEI Kite

One Pump

The main advantage of a one pump system is that it’s much quicker to inflate…I love them because I’m lazy. On the down side they do weight a bit more and can be a nightmare if you get a puncture.

If you have a one pump system you can simply take the kite out of the bag and roll it out with the leading edge (the large condom running the length of the kite) facing into the direction of the wind, with the struts on top facing skyward. Check all the tubes connecting the leading edge to the struts, they may well have some sort of gate system on them, if they do set these to open, if they don’t go and find out why they don’t have them from who ever you bought the kite from!

From here attach the pump leash to the leash attachment point normally found in the centre of the leading edge. Now as long as you have hold of the pump you have hold of the kite so by simply placing your feet on the cunningly crafted foot panels on the pump you can keep the kite in place with no hands!

Have a look at the valves on the leading edge of the kite. Normally you will one large valve with no type of stopper system, this is the dump valve used to get the air out quickly at the end of a session (so you can get to the pub quicker). The other valve should be smaller and may or may not have a stopper system.

You need to close the dump valve before you start to inflate the kite. Make sure the valve itself is clean and sand free (as sand will destroy valves as well!) and then fully close the valve. You do not need to push the valve into the kite (like on a lilo) but the valve should stay sticking all the way out, pushing the valve in causes damage to the bladder.

Get Pumpin’

Now simply fasten the pump nozzle into the inflate valve and start pumping. You will find that as the kite starts to form into its characteristic bowed shape the wind gets under the kite and the kite actually starts flying harmlessly in the smiley position, (you did attach the pump leash didn’t you?).

If its the first time you’ve inflated it some of the struts may not inflate properly because of kinks in the tubes running from the leading edge to the strut, straighten out the kinks and you should be gold (also check the gates are set to open before you start smashing things up).

No One Pump?

If you don’t have a one pump system, then roll the kite out like a towel, with the wind flowing over the length of the kite. You can then take a bit of sand and use it to secure the upwind wing tip of the kite only. Do not put sand all over the kite as not only is it unnecessary but can actually cause problems as the wind can now get under the kite and actually form the material into a sail shape causing the kite to take off. By securing it only at the upwind point you are ensuring the kite is simply a flag, and while it can still take off if you don’t secure it properly, once fully secured it will sit quite happily.

From there pump the struts up one by one, in no particular order and then inflate the leading edge. Half way through inflating the leading edge you’ll need to spin the kite around into the “smiley” position to prevent it from making you look like an idiot as it attempts to take off sideways.


Securing The Kite On The Beach

You want the kite to be as hard as you can effectively manage. Be more concerned about under inflating the kite than over inflating it, most bladders are built very well these days and it’s likely you’ll break the pump before you burst the bladder! The only exception to this is if you’re going to leave it sitting on a very hot beach for a long time (which I really wouldn’t recommend you do anyway) as the air will expand and could cause your kite to explode.

Some kites come with a recommended psi (for most it’s just damn hard!) and many pumps these days have a air pressure gauge so you do this with a high (ish) level of precision. If not drum skin tension is what your aiming for (probably harder than you think!).

Simply remove the pump leash from the kite (keeping hold of the kite whilst you do) and now holding the kite by the leading edge in the centre flip the kite over and lay it on the beach leading edge down with the wind flowing over the centre strut (or panel) of the kite so forcing the kite down onto the ground.

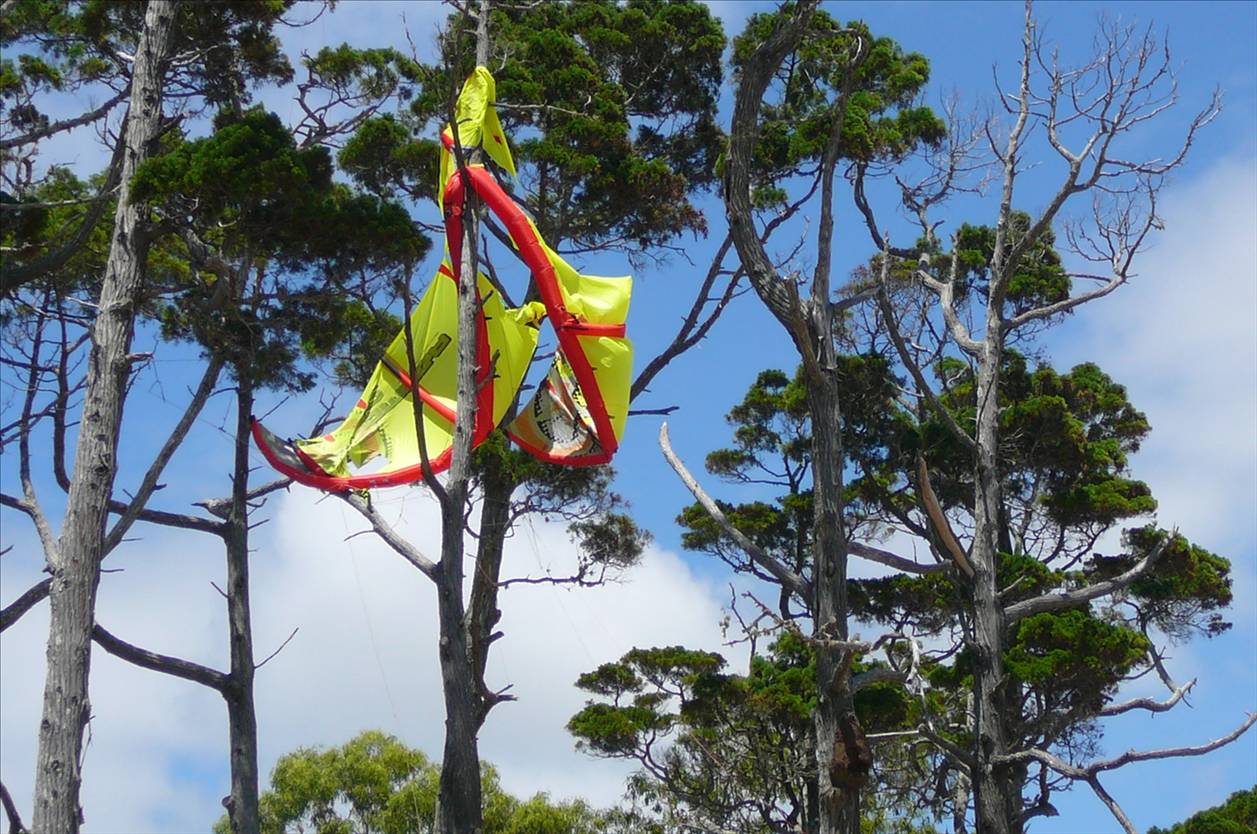
Take some sand and place it on the centre panel(s) of the kite. The windier it is the more sand you’ll need but as my CO used to say…’there’s no such thing as overkill’ put a tonne on and it’ll save you from potential embarrassment later as you’re picking your tattered kite out of that barbed wire fence or tree that looks so far away right now!

Kite in Tree

The Bridle

Now that the kite is sorted come round the back of the kite and take a look at the bridle. The bridle consists of the lines that run off the kite in triangle formations, where the lines from the bar will attach.

These should be free of knots and any pulleys should be clear of sand and free to run up and down the line. While you are there check the lines these pulleys run over that they are not worn, as soon as these start to show signs of wear and tear they should be replaced as they are one of the major fail points of any modern kite.

Once your happy with the bridle you’re ready to…

Sort the Bar Out

Now roll the bar and lines out downwind. We do this downwind so that once everything is set up we can easily look up our lines and check everything is attached to the right bit with no tangles and in case we haven’t put enough sand on our kite we will get another chance to rescue it from the barbed wire fence as we are in the way!

Once your lines are laid out seperate them and simply match the lines up with the corresponding pigtails on the kite. Note most bars are colour coded to ensure you get things the right way round. These are often coded using the nautical system of Port or left being red…”There’s no RED port LEFT in the bottle.”

Now because at this point we are effectively setting up our kite backwards (the kite will always fly downwind of you) the rule reverses, so when setting up the kite this way we ensure that the red side of the bar is on the right hand side.

Often the pigtails on the kite will be colour coded to match the bar so ensure you are attaching red pigtail to red pigtail and all should be cool!

Posted on Leave a comment

Tidal Range & The Rule Of Twelfths

Tidal Range and the rule of 12ths

Tidal Range and the rule of 12ths

Something you will definitely become an expert on if you live in a place affected by tides is how the sun and moon affect the tide and how the tide actually works. This is absolutely vital to understand if you are to keep yourself safe but also get the most out of your sessions. Timing a session right as regards the movement of the tide can be the difference between an epic session and a session spent sunbathing.

What is Tidal Range?

Tidal range is defined as the difference (in meters) between the low tide mark and the high tide mark. Thus if you have a low, low tide and a high, high tide, the tidal range will be great, conversely, if you have a high, low tide and a corresponding low, high tide, the tidal range will be small.

Tidal range is controlled by the alignment of the sun and the moon. When the sun and moon come into alignment as happens twice a month then all the gravitation pull aligns in the same direction. This has the effect of sucking all the water on earth into the middle of the globe. As water cannot sit only on one side of the earth it is balanced on the other side of the world.

High, High Tides

As the earth rotates this bulge of water moves around the earth creating high, high tides as land masses encounter the ‘bulge’ and low – low tides when the bulge moves on. This alignment happens when ever there is a full or a new moon as at these times the sun and moon are aligned. It doesn’t matter if the sun and moon are on the same side of the earth or on opposite sides because the water has to be balanced on both sides of the earth the gravitation fields still align.

Low, Low Tides

Conversely when the sun and moon are out of alignment the tides will be significantly less as the water of the earths oceans will be distributed around the earth in a more even manner. This is seen most when the sun and moon are completely out of alignment or at right angles to each other, ie when we have a half moon, at this point the gravitation fields are pulling at right angles to each other so the earths water is distributed more evenly over the surface and we get correspondingly little tidal range, with high, low tides and low, high tides.

moon-tides

Spring & Neap Tides

These 2 events are referred to as Spring and Neap tides. Spring tides occurring at Full and New moons and causing high tidal ranges, and Neap tides occurring at Half moons and causing small tidal ranges. Because of the momentum like effect of gravity there is a slight delay of around 2 – 3 days between the moon state and the corresponding effect. Ie you will get a Spring tide roughly 2 -3 days after a Full or New moon.

Using this information you can accurately predict how high a tide is going to be on a particular day. In places with little tidal effect this may not be so important in other places (estuaries for example) this may be of huge importance and mean a difference of miles between high or low tide water marks.

The Rule Of 12ths

The rule of 12ths tells us (roughly) the amount of water that will be moving, either in our out, at any stage in the tidal cycle of a semi diurnal (twice daily) tide.

Starting at Low tide and moving towards High tide:

In the 1st hour after a low tide we experience what is called slack water. This is Where the tide isn’t really moving and thus not much water is flowing. A small amount of water will however be pushing up the beach. In this hour 1/12th of the total volume of water that is going to move as the tide comes in will move.

In the 2nd hour the flow of water will increase and speed up, during this hour 2/12ths of the total volume of water that will move with the incoming tide will move.

In the 3rd and 4th hours the tide really picks up speed and a huge volume of water will move. During each of these hours 3/12th of the total volume will move. So thats half the total volume of water in these 2 hours.

In the 5th hour the flow of water will start to slow again as the tide gets nearer to its highest mark, In this hour 2/ths of the total volume of water will flow.

In the 6th and final hour of the tide, the tide has more or less reached high tide and has entered the phase known as slack water again. In this hour only 1/12 th of the total volume will flow.

From here on the tide follows the same pattern but this time the water is flowing out.

The Time To Care

This information can again be critical in certain locations. The 3rd and 4th hour should be treated with a little respect anywhere where there is significant tide as a huge amount of water is flowing and it is flowing fast. This can have a huge effect on your safety, your ability to practice and the distance you have to walk to get back to the car.

It is beyond the scope of what I’m covering today to go into specifics of conditions that can be found at every single spot. That said you need to know if there are any particular hazards you should be looking out for, check with someone who knows about these things, kitesurfers, windsurfers, surfers, fishermen will all have a good idea of what you need to look out for.

Remember the sea is a big old girl and needs to be treated with respect.

Posted on Leave a comment

Hand Signals Used In Kitesurfing

 Communicating Over The Wind

As a kitesurfer you need to know the universal hand signals you will see employed on every kite beach the world over. This means that not only can you communicate with other kitesurfers on the beach even when it’s blowing a gale, but also that you understand what others are trying to communicate to you so you can be a help not a hinderance on the beach and join in launching, landing and generally helping out your fellow kitesurfers.

We will take a look at the most used hand signals showing you a goofy (you never know whether to smile or not!) picture and explaining exactly what it means. Please make sure to be polite when doing this. Other people are not there for your convenience and should be thanked appropriately.

Land My Kite…Please!

Land My Kite

Patting the top of the head with either hand. Given by the person in control of the kite to a bystander on the beach. The signal means could you please land my kite for me. The person in control of the kite will then bring it down and hold the kite within easy grasp of the lander. The lander should either simply attempt to hold on to the kite if not sure what to do or secure the kite on the beach.

Land Your Kite To Me

Land Your Kite To Me

Patting the top of the head with either hand whilst pointing at the kite. Given by someone on the beach, this signals tells the person in control of the kite to land their kite to this person. Generally used by instructors but seen in general use as well.

Thumbs Up..All Good

The universal thumbs up all good signal, generally given right before launch to signal the launcher to release the kite. Its opposite, the thumbs down again used in relation to launching the kite is given by the pilot if there is a problem with the kite and they DO NOT want the launcher to release the kite.

Now lastly before we send you out to fly your kite we need to talk about things to look out for when choosing your kite flying location and kite flying etiquette. For the moment we’ll keep it simple as I just want to make sure that when we let you loose on your local beach or in your local park you don’t make a nuisance of yourself and end up ruining your experience and that of other users of the area.

Before you start

Before you even think about hoisting your kite make sure you do a thorough risk assessment of the area you’ve chosen to fly your kite. Remembering the lesson on obstacles and their effect on the wind speed ensure there is nothing in the area creating wind effects likely to cause you problems. You are looking for trees, buildings, hills, cliffs etc and should really be pretty obvious!! The real one to watch out for here, as they’re not always immediately obvious are power lines, do not practice anywhere near power lines!

Make sure you are permitted to fly kites in that area. Sounds simple but more and more kite flying is only permitted in designated areas, outside of these areas you can often have problems with members of the public or more seriously the police. You might also find other kiters telling you to move to protect their own “right to fly” in the designated areas. Remember it only takes a few idiots breaking the rules for the local council to step in and ban kiting altogether. An outcome no one wants, check with your local kite shop or local council first.

The 3 C’s…Check, Check, Check

Check the wind speed. You’ve just gone out and bought a new anemometer, use it, and make sure you stick to the manufacturers guidelines about what winds to fly your kite in. The golden rule here is, “If in doubt, don’t go out.” Better to live to kite another day than get over confident and wind up in hospital with broken bits!

When the wind blows it does not blow a consistent speed all the time. The wind speed changes direction and speed almost constantly. These changes in wind speed are referred to as gusts. If the wind is gusting too high above the average wind speed it makes conditions for flying kites dangerous and unpredictable. For example it’s perfectly feasible to have an average wind speed of 18 knots with a gust speed of 29 knots…that would NOT be a good day for kiting! If the wind is gusting too much then at least until you’re confident…forget it. It’ll be unpleasant and dangerous. How much is too much…very difficult to say but I would say if its gusting 10 knots or more over the average wind speed take yourself to the pub instead.

1. You NEVER Have Right Of Way

The simple rule to follow here if you want an easy life and you don’t want to spoil access to the area where you’re practicing for yourself and for other potential kiters is simply give way to everyone, dog walkers, families, other kiters…everybody. The more polite and considerate you are to other users of the area the better of you’ll be in the long run

So what do I mean by ‘give way’ simply put if anyone comes with ‘twonking’ range of your kite or lines (normally if they come with 50m of you, downwind or 20m of you upwind) either drop your kite or at the very least (and if you have enough control) move the kite to the complete opposite side of the window.

2. Be Aware Of The Space You Are Taking Up

Kite flying takes up an incredible amount of room, at least 25m in every direction downwind due to the length of the lines, you should double this distance to give you a sizable buffer zone as well. So if you reckon you should have clear space of 50m in every direction downwind and at least 20m upwind, you can begin to see how much room you are effectively occupying.

Please be aware this land is (probably) not yours and you must respect other users of that land. It only takes a phone call to the local council from one irate dog walker and the next time you arrive at your favourite kite spot you find signs up everywhere banning the flying of kites at that spot. Councils will pretty much always side with a normal user of the area over a kiter and in many places kiting is being increasingly viewed as a nuisance. Please don’t give councils the excuse they are looking for to stop kiting in your local area…how do you do this?

Simple, be courteous and GIVE WAY TO EVERYONE!
3. Obstacles And Hazards In Your Flight Area Will Hurt!
 Make sure your flight and launch and landing area are clear of any hazards, obstacles or anything else that can hurt if you collide with it. Whilst flying the kite initially you will find it difficult to concentrate on anything else and can easily end up moving around more than you intend. Besides, having something in your flight area that you’re trying to avoid simply makes the whole process much, much harder.

If you have any doubts about where you can and can’t fly kites please get in touch with either your local council or local kite school who will be only too happy to help.