Posted on 4 Comments

Switch Kites Element 2012 Review

Switch Kites

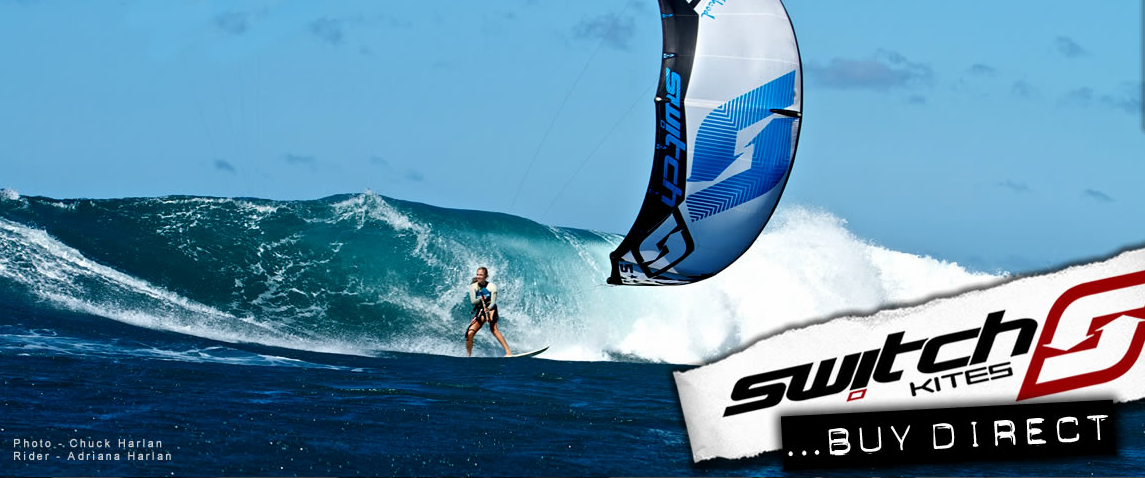
We’re going to take a look at one of the new players in the kiting industry rocking the boat with their disruptive business model, namely by only selling direct and thus cutting the cost of kitesurfing equipment almost in half. Switch kites are leading the charge in this Brave New World.

Simply put the only place to buy a Switch kite is from their website. That way they don’t have dealers or distributors who then add their own margin on to the original cost of the kite. They have several warehouses around the world where the kites are drop shipped from (often with next day delivery).

This model means that Switch can deliver top of the range kites and boards at almost half the price of brands with a more traditional model of distribution. Last we checked a brand new 11m kite and bar from the Switch website was a little over 800 €…and these babies really are top quality.


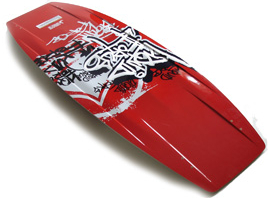
Designed as the all rounder free ride kite in the Switch line up the Element is marketed to:

“All skill levels, from the novice rider through to the hardcore all rounder: The Element is the one kite travel companion when exploring the world.”

We ordered our Element off the Switch website and found the process as easy as it gets on the internet. 5 days later the kite was there on our doorstep (5 days as we’re in Europe) if you’re in the UK or a country where one of the 5 Switch warehouses is located it’s next day delivery.

[youtube height=”315″ width=”560″]http://www.youtube.com/watch?v=deh2owI-lII[/youtube]

The Bag

Straight out of the bag you get the impression that this is something pretty special. The bag is stylish and compact. It has a pocket inside the bag to hold the bar (which also has it’s own bag) so when you’re traveling the bar is nicely tucked away inside the bag and the only thing outside the bag is the pump, which attaches on the lid of the bag. The zip has protection so you don’t catch the kite when zipping the bag up and in a nice touch you get a spare inflate nozzle attached to the bag. (more on that later). It also has netting on the underside of the bag to let excess sand drain out once you’ve packed away. Inside the front pouch of the bag is a repair kit, nicely packaged in a canvas wallet containing everything you need for emergency repairs at the beach, and of course the regulation stickers! In short we were impressed from the outset.
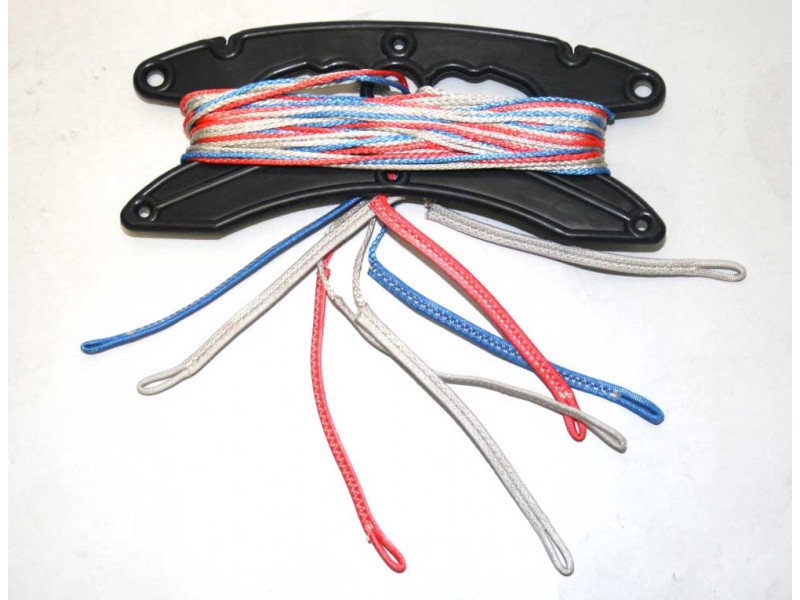
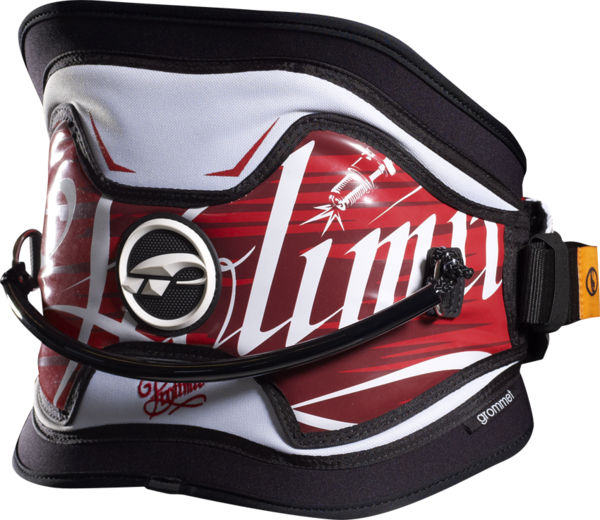
The Bar

Some very well thought out features here. The first thing we noticed when rolling it out was  the choice of attachment points for the lines so you have the choice of positioning the lines on wide or narrow setting meaning no more needing to buy 2 bars. If want to fly with a smaller kite, just re attach the lines at the narrow setting (done easily using a larks head) and the bar changes from a 55cm bar to a 45cm bar and you’re off.

The lines come with 3 metre extensions (taking them from 23m down to 20m) but unusually these are at the bar end of the lines. This is actually brilliant. The extension attachments are simply spliced line so they are nice and discreet and by having them at the bar end of the line it avoids them getting tangled anywhere near as much as they would if they were at the top of the lines (where the lines naturally tangle more easily), a very nice touch.

The centre lines have a swivel to keep them from getting twisted, unlike many of these systems this one  actually works. The de-power is above the bar and is very easy to pull on and lock off even when over powered. One slight caveat is that once pulled the loose de-power line tends to flap around and get twisted round your lines, while there is a velcro attachment, it very quickly stops working effectively and it would be nice if there someway of locking this down neatly. (this apparently has been fixed in later models of the bar…see the comments below)

Again in another nice touch the donkeys dick is curled to avoid it accidentally releasing if you catch it on you harness while pulling the bar in too close.
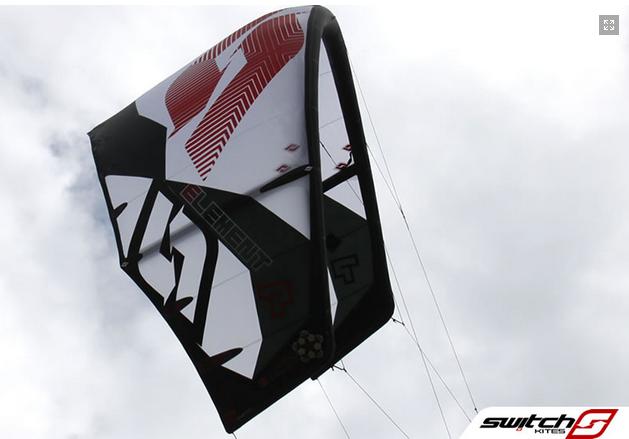
Switch Element 2012 Kite Kitesurf 04

The Kite

The kite is a 3 strut affair with a one pump system. The first thing you notice it when inflating it is the inflate valve. Looking something of a cross between the Cabrinha system and the Liquid Force system it’s a one way valve that requires a specialist nozzle but massively reduces inflate/deflate times. You get one of these nozzles attached to the pump and in case you lose it or forget your pump that day there’s a spare one attached inside the front pocket of the bag. The whole system works very well and we love the “screw me or lose me” reminder on the kite, ensuring you close the valve every time you pack the kite away…whilst obviously smiling and thinking of the second most fun thing to do in the world!

The kite itself has all the features that you would expect from a modern kite but that non of us really understand. Kevlar reinforcement, those funny handles on the wind tips to self rescue with, and all the technical bits with overly complicated names that i’m not going to get into here. Most importantly it looks solid, stylish and well made.

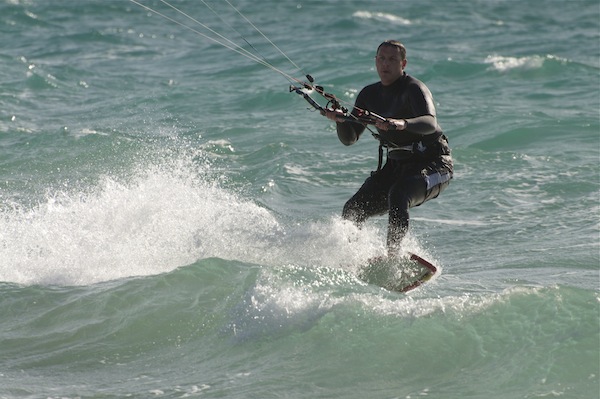
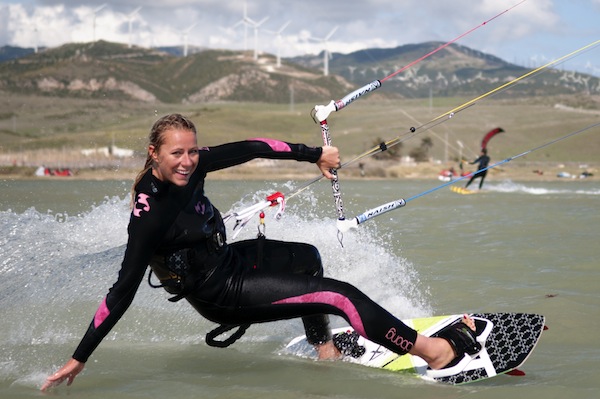
The ultimate question of course is how does it fly? 

Quite frankly brilliantly. We have an 11m Element and I have to say it feels more like a 9m it’s that fast. Super stable with easy relaunch, it does everything you’d want in an all round kite with a nice balance of low and top end, decent boosting and an easy, fluid feel.

Now we’ve only had ours about a month so have yet to really test it’s construction but at long as that holds I do think we could be starting a long love affair with Switch kites.

[youtube height=”315″ width=”560″]http://www.youtube.com/watch?v=vKBie6SJuM0[/youtube]

Cut The C***!

Now I hate these reviews in kite mags that simply blow sunshine up kite manufacturers asses because they rely on them for advertising and I always promised myself it was something we would stay well away from and so I have to put something detrimental about these kites, my conscience simply won’t allow me to be so sugary.

If I had to pick one thing it would be the customer service at Switch often leaves something to be desired…these guys do not respond to email well. We’ve sent them quite a few emails over the past few weeks and either had to wait a long time for a reply or more commonly simply received no reply at all. The best way to get in touch seems to be through the live chat on their web site which in fairness is manned fairly consistently

All in all though this kite is quite frankly awesome, it looks and handles like a kite that you’d expect to pay around 1400€ for and the 11m kite and bar cost us 822 € delivered to our door, I just really don’t think you can argue with that.

This article was taken from Tantrum Kitesurf Magazine…start your FREE trial today!

Posted on Leave a comment

What Are These Line Extensions On My Kitesurf Lines?

Kitesurf Line Extensions

[icegram campaigns=”7743″]

Kitesurf Line Extensions

Why does my kite have line extensions?

Something many people new to the sport wonder when they unpack they’re first kite is why do the lines split apart at one point in to 2 lines, 1 much longer (generally between 18-20m) and the other generally between 3 and 5m.

If you have no idea what I’m talking about have a look at your lines next time you roll them out. If it’s a fairly new bar then most likely about 3 metres from the end (it could be at either end) you’ll see that the lines are spliced and then joined together with 2 interlocking loops. (If you’re lines don’t have this don’t sweat it, not all lines do).

These line extensions are designed to give you more flexibility when flying your kite. Without getting too technical, as the kite moves faster it gains more power. The kite will move faster if it is given more space to move in (as it has more time to build up speed). Thus by making the lines shorter we reduce the amount of space the kite has to move in, so reducing it’s top speed and reducing the amount of potential power available.

Why would you want to do this?

Well for a start it means that you can use your kite in a wider range of conditions, so a kite on 20m lines will be more manageable in higher winds than the same kite on 23m lines, more value for money…bonus.

The other side effect of shorter lines is the kite responds much quicker, so it will turn faster and react quicker. This is due to the reduced lag (the longer the lines the more they tends to bag out behind the kite thus reducing transmission time) and the more severe angle from the lines up to the wing tips.

Why does this matter?

Well lets say you’re looking to go wave riding. Having a kite that responds much more quickly to your input is very useful when you’re cranking out those top turns. The reduced length also makes re launch that much easier for the reasons explained above, which can be crucial when your in the impact zone with some mean looking waves.

Posted on 2 Comments

Waist vs Seat Harnesses in Kitesurfing

Waist Harness

Waist Harness

Which One Should YOU Be Wearing?

Seat Harnesses

The Seat Harness

Advantages

The main advantage of the seat harness is that that they will not ride up around your armpits. The leg straps keep the harness firmly in place around your waist meaning that beginners and those with lower back problems find them much more comfortable.

Support

They are often larger and more bulky than waste harnesses and so offer plenty of support. The spreader bar is also naturally positioned slightly lower down than on a waist harness and sits perfectly at your centre of gravity. Once riding this makes it easier for you to really crack the kite while resisting with your entire body weight.

Disadvantages

The greatest disadvantage of the seat harness is the looks, to say it looks uncool is something of an under statement….it looks like you’re wearing a nappy.

The other major problem for us gents when wearing a seat harness is that the leg straps can get wrapped around our nether regions and lead to some fairly unpleasant consequences and some fairly high pitched squeals, especially while jumping or performing high-powered maneuvers.

Because of the extra bulk they also much less comfy and more restrictive than waist harnesses.

My biggest problem with seat harnesses for those who can actually ride is that they allow you to sit down on the power of the kite, rather than counter balance it by leaning out. This leads to many new riders developing a “shitting” stance while riding i.e. bum stuck out, legs heavily bent, as it seems much easier and safer to control the power coming through the kite that way.

Problems with a seat harness

Unfortunately nothing could be further from the truth. In this position you have no ability to counter balance the pull of the kite and the first gust of wind or wave will likely send you sprawling over the front of the board. Conversely with your hips forward and your head thrown back, you simply push your hips forward a little more and lean back and you can eat up massive gusts.

If you look at the photo above you can clearly see if he pushed his hips forward and threw his head back, he would be in a much better position to handle the pull from the kite.


Waist Harnesses

Advantages

Waist Harness

Sex Appeal

They look cool, possibly the greatest advantage and most probably the reason why they are more popular on the beach is that waist harnesses look a lot cooler than seat harnesses. They are less bulky, have less straps and generally come in more creative designs. This alone is a good enough reason for most people to chose to wear them even if ignorant of the rest of the pro’s and con’s.

Comfort

In general they are also less bulky and thus more comfortable than seat harnesses. While the lack of leg straps give you a greater range of motion whilst wearing one. Indeed many people loosen their waste harnesses whilst riding to enable the harness to slide around as the kite and their body moves and several waist harnesses are now being built with slider spreader bars which move from right to left as your body position changes.

Shag Don’t Shit

For me the greatest advantage of Waist Harnesses are that they force the new rider into the correct posture. Because they will ride up round your armpits if you attempt to sit down on them, they force you to push your hips forward and fling your head back in that classic “shagging” position that leads to comfortable, controlled riding. If you try to sit down on the harness (in the “shitting” position) as can happen with seat harnesses, the harness will ride up around your armpits.

Classic Stance

Looking at this shot you can see that all Maria has to do here is drop a little bit of weight back (or throw her head a little further to the back) and she can easily control any gusts coming from the kite (this would also have the effect of pulling her harness down), her hips are pushed much further forward and the weight of the entre body is counterbalancing the kite

Disadvantages

The Wonderbra Effect

As mentioned before the waist harness can ride up, this is especially pertinent to beginners who are flying the kite an awful lot around the 12 o’clock position. This not only looks ridiculous but it is amazingly uncomfortable (but can be a great look for male onlookers if the subject happens to be a girl in a skimpy bikini!).

Pain In The Arse

Waist Harnesses also tend to sit higher on the body than seat harnesses. This can lead to more pressure through the lower back whilst riding and many people with lower back pain prefer seat harnesses because of this.

Crank The Kite

These harnesses also sit naturally slightly above most peoples centre of gravity, the bend between your hips and your stomach. This can make it slightly more difficult to really lean against the kite and drop all your weight on it when needed…ie when generating “pop.”

Boardshorts Harness

To Conclude

So all in all, seat harnesses are generally preferred by beginners due to the fact that it will not around your armpits and is more supportive and easier through the early stages of learning to fly a kite. Once people progress to riding upwind and starting their 1st tricks they generally move onto waist harnesses. For people with back problems I would always recommend seat harnesses.

On a side note there is now a range of seat harnesses that incorporate themselves into board shorts (they are actually stitched inside the lining of the shorts themselves). This eliminates one of the seat harnesses greatest disadvantages in that they actually look quite cool!

Posted on Leave a comment

Strapless Kitesurfing

Strapless Kitesurfing

[icegram campaigns=”7743″]

The latest craze hitting the beaches of Tarifa and kitesurfing beaches all over the world is riding surfboards without foot straps. People are either taking their old kite surf surfboards and removing the straps or dusting off their (often even older!) surfboards waxing them up and heading out. If you fancy giving this a try read on….

Riding strapless has many advantages. The first of which is that it gives you a reason to dig that old surfboard out of the garage and get some use out of it. There is no specific size that works best though something around 6’2″ is probably ideal. I use an old Mini Mal board which measures in at an impressive 7’8″ and means I can ride in almost no wind!

For those of you with knee problems the freedom of strapless riding may just give your kitesurfing a new lease of life. Due to the fact that your feet are now free to move around the board as much as you like, rather than being held in one constant position you can relieve the strain on any aching muscles much easier and save those knees from all the jarring they normally take in an average strapped session by being locked into one position.

The sense of freedom you get being able to walk to up and down your board in this fashion makes the actual feel of riding much more akin to windsurfing. As you get good you can even master jumps and all sorts of crazy tricks.

Most people look at strapless riding and wonder how the hell the board stays on your feet. To be honest as long as the waters not too choppy it’s fairly simple. The opposing forces of the kite and the water actually glue the board to your feet, just notice next time your simply riding your twin tip how little you rely on the straps to keep your feet in place when you’re actually riding (on flattish water) and you’ll see what I mean.

The trickiest part (at least until you start tackling waves) is the actual water start, because of the extra volume in front of your feet (as the nose of the surf board extends a lot further in front of you than it does behind) the board has a tendency to screw into wind as your attempting to waterstart, to couter act this you need to really curl your back leg under you while pushing away with your front. Added to this however is the fact that you’re going to lose the board every time a wave hits you while your setting your self up. For this reason you’re better off practicing this initially on calm days. This is made easier if you have a massive board that you can take out when the wind is light and the water pretty flat. Oh…and make sure you wax the board up well!

Posted on 4 Comments

Why Are Kitesurfing Boards More Expensive Than Snowboards?

Kitesurfing Boards

Kitesurfing Boards

I was asked this question the other day and thought I’d share my findings.

The main reason I could determine comes down to economies of scale, although exact (or even nearly exact) figures are difficult to come by, it’s pretty obvious to me that there are a LOT more snowboarders in the world than kitesurfers. As a result there will be a lot more snow boards manufactured every year than kite boards, this drives down production costs and allows them to be priced lower.

Add to this the fact that kite boards have fins (which can be bloomin expensive) foot pads, foot straps and a handle (unless your cool and have taken the handle off!). All these accessories cost money and so it is probably fairer to compare like for like price between a snowboard with bindings and a kite board, when you do this the difference isn’t so huge.

When you actually compare the prices of high end snowboards against high end kitesurf boards you notice much less of a difference, top end production boards in both sports tend to retail for around 600 € the main price difference tends to appear at the bottom end of the price range where you can pick up a pretty decent snowboard for around 200 €. I would imagine this is due to there being a much wider variety of manufacturers all competing for the mass market of people who want to own their own snowboard but only snowboard once or twice a year so aren’t going to pay top dollar for one…which lets face is the category that most of us fall into. The kitesurfing market simply isn’t large enough to support this many manufacturers and so competition on price at the entry level is less fierce.

Any thoughts?